How to Make Spooky Halloween Bunting Now is the perfect time to start this quick project. I love Halloween and I love bunting so I thought I'd combine the two and make some spooky halloween bunting.
I chose a plain orange fabric and backed it with a stripy one. If you used a patterned fabric you could just make the bunting and not put on any felt cut-out shapes. You could also buy ready cut shapes and use them.
It's not difficult to make and would look great across a doorway or in a porch.
What You Will Need
Basic sewing equipment
Sewing machine
Scissors
Tape measure
Pins
Thread
Iron and ironing table
Rotary cutter and cutting mat - optional
paper to make template
2 yards of bias binding
Black felt
Bondaweb® or similar (joins two fabrics together with the heat of an iron)
Black felt
Bondaweb® or similar (joins two fabrics together with the heat of an iron)
Method
Make a template that is 7¼" x 7¼" x 7¾"
Iron the fat quarters
Place the fabric right sides together and make sure one edge is straight.
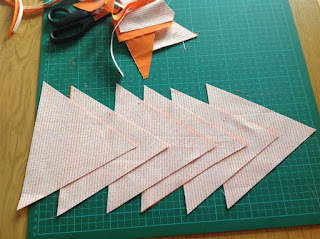
Cut 6 triangles of each fabric using the template. I like to use a rotary cutter and mat. I cut through both pieces of fabric at the same time. If your rotary cutter is sharp you can easily fold the fabric again and cut through 4 layers. Turn the template at each cut to avoid wastage.
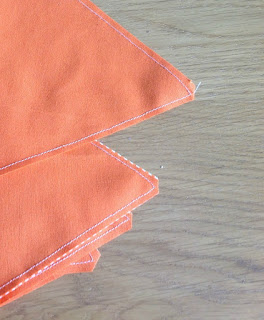
Cutting 2 layers at once makes it easier to sew as the triangles are already aligned .Stitch along the 2 shorter sides about ¼" away from the edge.
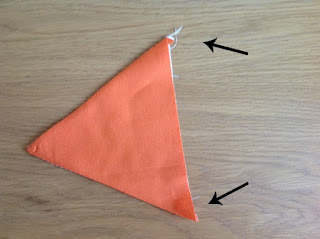
Cut off the points of the triangles and turn the correct way.
Use the tip of your scissors to make a sharp point.
Iron the triangles.
Cut the little bit off that is now poking out.
Iron the bias binding in half. I do this as it makes it so easy to place the triangles and then I do not need to pin them in place.
Place the first triangle about 8½" from the end. Sew in place keeping close to the edge.
 |
| Add caption |
Keep adding triangles leaving about an inch between each one.
Neaten the ends. If you have used patterned fabric your bunting is finished!
But mine is plain and I want to decorate it.
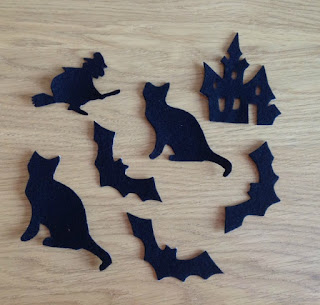
I copied some images from the internet onto plain white paper. The cat I printed but the other images I literally traced from the screen as I'm hopeless at getting the printer to print the exact size I want. I used Clip Art Queen for some of my images but there are loads to choose from.
Lay the Bondaweb® over the drawings glue side down and trace them onto the paper side of the Bondaweb®.


I wish i'd listened in home economics at school as I am useless at stuff like this and these look fab!!!
ReplyDeleteThey really are easy, if you make them with themed fabric the only skill you need is sewing in a straight line! Oh and how to use scissors lol. But with little ones time is the hardest thing to find.
DeleteThis bunting looks great! What a great idea x #love2blog
ReplyDeleteThanks Kirsty :-)
DeleteWow! That is so good and so effective! It looks fab :) The images are so cool :)
ReplyDeleteGemma xx
Thanks Gemma, lighting was a nightmare, it kept coming out peachy coloured not orange! Hence the picture of it on the fence in sunshine :-)
DeleteThis is fantastic, and so effective! I think even I could manage this, and I am very un-crafty!
ReplyDeleteIt really is easy if you can sew in a straightish line :-)
DeleteI did a fashion degree so spent quite a few years sewing, and have to say I really miss it! I love this bunting and it really is easy to make. I bet so many people will see this and be inspired to sew, because it's not as hard as it looks! X
ReplyDeleteIt really is easy. I did it! Love that you have a "Bear" too! Just read your about us page. Have confidence, you can do it! Wish I had more followers because I would support your new venture. Good luck xx
DeleteThis looks fantastic! I would love to be able to give this a go in time for our Halloween party. You have made it look so easy but I bet with my sewing skills mine wouldn't turn our even half as good as yours x
ReplyDeleteHonestly it is as easy as it looks! I was really happy with how it turned out and all you need is to be able to sew a straight line.
DeleteThat looks really simply, I love how a simple row of bunting can change the room and make it feel all spooky!
ReplyDeleteIt really does, and its not very difficult. I loved making it.
DeleteThis looks so cool. And not too complicated... great to be able to use it over and over again too :)
ReplyDeleteThanks Kate, I thought so too. I just love bunting and this could be adapted to any occasion.....mmm maybe I'll make some more, Christmas or a Birthday :-)
DeleteWhat a nice job. The bunting looks so cute with the cut outs.
ReplyDeleteThankyou, they were so much easier to do than I thought. I loved doing it.
DeleteThis bunting is so cool. I seriously need ti get myself a sewing machine.
ReplyDeleteIt looked wonderful in the window this Halloween. I'm sure there's a way of making it without sewing....I need to do a practice.
DeleteLove your bunting - I am useless at anything like this - but do admire your skill :) Kaz x
ReplyDeleteThankyou, that's a lovely thing to say.
Delete