Friday, 19 August 2016

Toddler Bedroom Wish List

Bear naps every day in his own room in our house, he has occasional sleepovers too. He's 22 months now and it won't be long before his cot is transformed into a toddler bed. Unlike a bedroom at home that may be multi-purpose this is to be a place he can wind down and just sleep. It also means I have the fun of buying new bedding, curtains and a few bits and pieces to make his room all cosy. So when Yorkshire Linen* asked if I would like to write a post including some of their products I thought it would be great to compile a Toddler Bedroom Wish List.

I have two themes in mind a pastel Farmyard or a brighter Robot. He loves farm animals and has just started to love robots too. They wouldn't worry him and stop him sleeping as they don't "bite" like Dragons and Dinosaurs may do. I have chosen a lovely soft duvet too that would be wonderful to snuggle under in the cold winter months. So here are some of my favourite things.


toddler-bedroom-wishlist-collage-curtains-duvet-cover-robot-and-rocket-toy-space-ship-sheets-rocket-lampshade

SHARE:

Sunday, 20 December 2015

Bears 1st Christmas Party

This week was Bears first Tots Club Christmas Party. We weren't too sure how much he would enjoy it but we were determined to go. Bear refused his morning nap which meant we got to the party on time (yeah!) but he was very tired (booo!) so after an hour we decided to leave. That was plenty of time for us!

toddler being held and watching everyone
Watching with Grandad

SHARE:

Monday, 9 November 2015

How to Make Fabric Shelf Trims

I wanted to make shelf trims to brighten up Bears nursery. I used fabric because I wanted it to match the curtains I had made but I'm sure these could easily be made out of card.


For the bunting you will need;

Bias binding the length of the shelf
Two complimentary scraps of fabric and the same amount of Bondaweb or equivalent
Hot iron
Glue gun (optional)


knitted pirate sat on shelf with green bunting as trim


green plain and striped fabric and a piece of Bondaweb


Sandwich the Bondaweb between the fabrics, wrong sides together and iron with a hot dry iron.

fused fabric on cutting mat

Make a template for the bunting. Just a small triangle with the top shorter than the sides. Cut the fabric into strips and place the template on the fabric. Cut triangles turning the triangle upside down so no fabric is wasted.

triangle template on strip of fabric


Cut a piece of Bondaweb the same width as the bias binding, iron onto the bias binding and carefully remove the paper


piece of Bondaweb and bias binding side by side


Position each triangle in the bias binding and fold, alternating fabrics and then iron. The Bondaweb will stick it all together.


triangles placed in fold of bias binding


Attach to the edge of the shelf. I used a glue gun.

bunting attached to shelf

For the train shelf trim you will need;

Bias binding or tape the length of the shelf
Scraps of fabric in 4 different colours
Iron on heavy weight interfacing
Bondaweb or hot glue gun
Template of train and carriages (I got mine from Sweetclipart.com)

Trim attached to shelf


If using tape then miss this step, I only had bias binding so I used Bondaweb to fuse it together. Cut a piece of Bondaweb the same width as the bias binding, iron onto the bias binding and carefully remove the paper. then fold in half and iron.

bias binding folded in half lengthways

Trace the carriages and train onto the interfacing. Remember the train will be reversed when cut out. The carriages are the same both ways. 

carriages drawn onto interfacing


train drawn onto interfacing

Iron the interfacing onto the fabric

interfacing ironed onto red fabric


interfacing ironed onto yellow fabric

Cut out and arrange onto the tape.

cut pieces positioned on tape


If you have a glue gun stick each piece to the tape.

small carriage with glue on it


If not cut a small piece of Bondaweb and iron in place.


small carriage with bondaweb on it

Attach the trim to the shelf. I used a glue gun.

I haven't decided what to put on the shelves yet, just Samuel Crowe looking a bit lonely.

shelves finished

whole room with shelves in it


SHARE:

Nursery Makeover #2 Wall Stickers and Shelf Trims


collage of monkey from wall stickers and shelves with trim.


Well I had a big clear out of the nursery and finding homes for all my precious stuff was hard work but finally it was done. So now the nursery looked boring and bleak.


Collage of two pictures of empty shelves and side cupboards


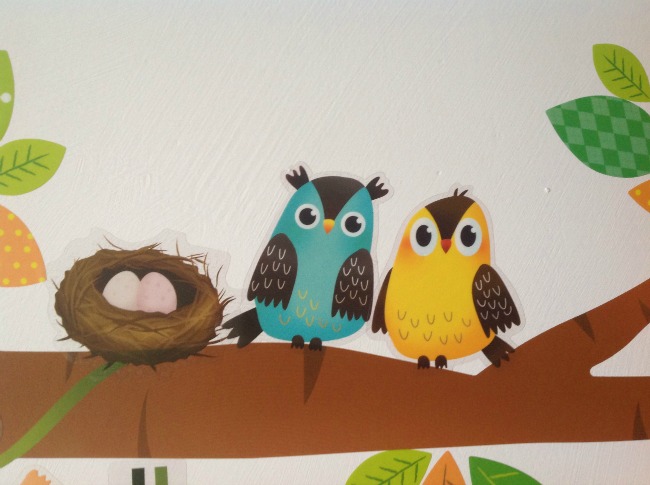
The room needed something to brighten it up and so I bought some Decowall, Little Monkeys and Animals Height Chart Wall Stickers. I asked Grandad to put this up while I was making some shelf trims. He didn't shout or curse too much so I think it must have gone up OK. They are described as Removable, Repositionable without leaving any trace but when we tried to take it off to reposition it took the paint off. This wasn't a problem for us as the room hasn't been recently decorated and I think it will be on the wall for a long time but I would have been annoyed if it was freshly painted.


Packet of Decowall wall stickers

 It looked fantastic when it was done. I'm sure Bear will love it. Don't know how I'll get him to stand still to get his height though!


Height chart wall stickers


monkeys detail of wall stickers


Birds and nest detail of wall stickers

Giraffe and lion detail of wall stickers


The shelves in the corner were old shelves from an end unit that I had reused. They are a bit tatty but too good to throw out. I had previously trimmed them with paper tape, flowers and mirrors but this was not suitable for a toddlers room so I took that off and replaced it with lovely green bunting and little train bunting to match the curtains. If you'd like to make them there is a picture guide here.

I think they are adorable and make the room really happy. I still have to decide on what to put on the shelves. At the moment all that is there is Samuel Crowe, a pirate I knitted a while ago.


shelves with trim and knitted pirate


wholw room with wall stickers and shelves

toddler looking at camera pointing to wall stickers
Bear loves the animals.
Bear won't stand still to measure his height and absolutely loves the animals. What do you think?


SHARE:

Sunday, 1 November 2015

Nursery Makeover #1 Curtains

Bear has his own bedroom in our house. This is great when he naps and stays overnight. The problem is that this room is really my craft room, well was!

It was OK to have it full of my stuff when he was a baby but now he's a toddler I need to make it into a nursery. I'm sure it won't be long before he's climbing out of his cot and so I really need to make the room fun and safe for him.

I had a spare pair of navy curtains that were too wide and too long for the window. Now the colder weather has arrived I needed to shorten them as they would cover the radiator and stop the heat getting into the room. This was my task for today, just shorten the curtains. You can see how I shortened them here.

While I was doing that I decided to make them narrower and decorate them to make them toddler friendly.

I didn't want anything too stimulating that would keep Bear awake looking at the curtains and decided on a train. I found my template on Sweetclipart.com. They have a variety of simple designs to choose from.


curtains hanging in room

Equipment


Curtains
Template
Fabric Remnants
Bondaweb
Steam Iron
Ironing board
Pencil
Scissors

Instructions


First get a template of your design. I chose a simple train engine and carriage. The simpler the better.


Drawing of train engine and carriage

 Trace the design onto the bondaweb. One side has paper, the other glue.


bondaweb on top of drawing on red fabric


Train engine traced onto bondaweb


 I wanted my designs to mirror each other so I folded the bondaweb and traced another engine.


bondaweb folded to show reverse image


bondaweb with both images of train engines drwn onto it


 Then iron the bondaweb to the wrong side of the fabric.

bondaweb ironed and fused onto red fabric


Cut out.


two train engines facing each other cut from fed fabric
They are red but the sunlight made them photograph as pink.

I did the same for the carriages. They were identical both ways so I just cut 6 the same.


Bondaweb with carriages drawn onto it iron onto 3 different fabrics

6 cut out carriages

Then place onto the curtains.

Navy blue curtain with images placed onto it.


Remove paper backing and press

finished design ironed onto curtain


Do the same for the other curtain. I measured mine from the hem so they matched.

2 curtains together showing mirror image of train engine


As you can see the room is full of my clutter. That's a project for next weekend.

room with clutter and cot and window with curtains.

collage of two pictures left flowery right new made up curtains
Before and After


SHARE:

How to Shorten Curtains Without Sewing

I'm sure a lot of you know how to shorten curtains and probably have more experience than me but this is my way of reducing the length of curtains without sewing. I hate to throw anything away so love to adapt items to give them a new lease of life. This method is great for light weight curtains, heavier fabrics may have to be sewn but the method of shortening will remain the same.

This is not a task for the faint-hearted! Although it is really easy to do, just handling large amounts of fabric can be a nightmare.

Curtains at window

I had a pair of curtains that were way too long for the window and because the radiator is under the window when they were drawn they cut out all the heat so I thought I would just reduce the length. I ended up decorating them too! Instructions for this can be found on my blog Nursery Makeover #1 Curtains.


Equipment 


Curtains
Steam Iron
Ironing Board
Large Worksurface
Rotary Cutter and Cutting mat
Measuring Tape
Chalk or fabric pen
Wonderweb or similar iron on hemming tape


How to Do It


First measure the window and decide how long you'd like your curtains. Add enough for a decent sized hem. At least 4cm.

Lay the curtains on a work surface. I used my dining room table.

Curtain on a work surface. A dining room table


 Line the top of the curtain with the edge of the table. This keeps the curtain straight.

Tab of curtain lined up with table edge


Measure carefully from the top the length you need (don't forget the hem allowance) and mark. I used tailors chalk.

Measuring tape on curtain


Mark the measurement on the fabric


Measuring tape and ruler with marks at correct length


Using a ruler, rotary cutter and mat cut along the line.


Curtain with rotary cutter and mat. The waste has been cut off.


Place onto ironing table and fold over the hem. Press with the steam iron.


Picture showing raw edge folded

Fold the raw edge in, measure the hem allowance and press again.

Hand holding hem and tape measure


Cut the wonderweb the same length as the width of the curtains. I used 2 pieces because I wanted a deep hem. Lay the wonderweb along the hem and press.


Wonderweb along edge


Hem pressed and complete


SHARE:
© Teddy Bears And Cardigans. All rights reserved.
Blogger Templates by pipdig